
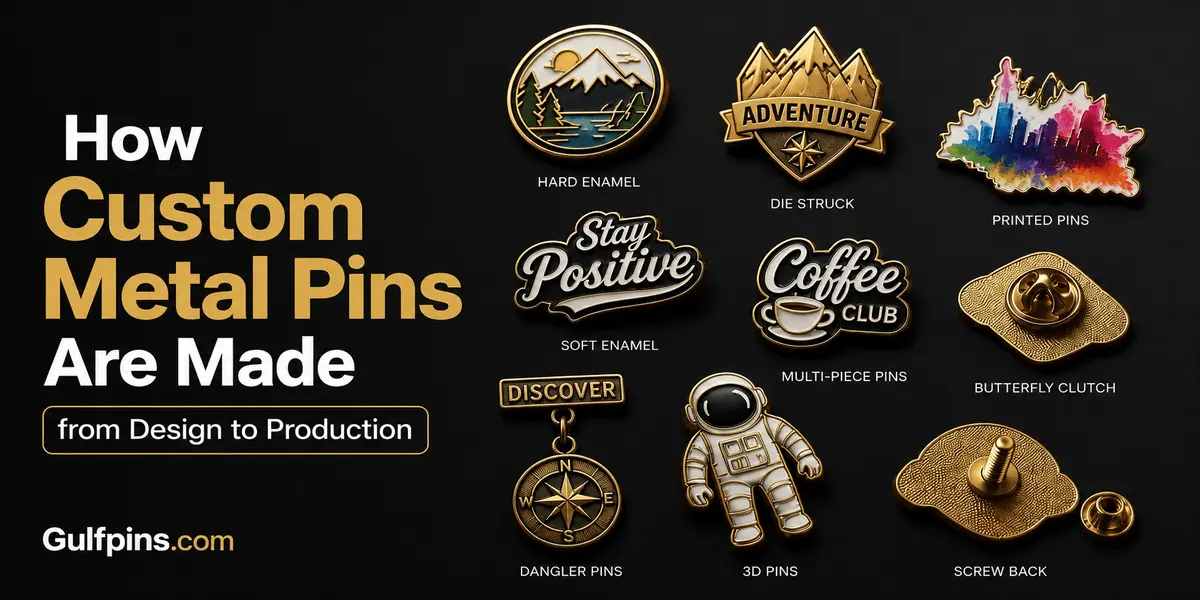
How to Make Custom Metal Pins Step by Step
Have you ever ordered a custom pin that looked just perfect on screen, yet it came with faded details, hues that were different from each other, and an overall cheap look? Do not worry, it’s not just you. Many pin projects fail, the problem lies not in the idea, but in what happens during the creation of the product.
Custom metal pins are made not only by printing. In reality, custom metal pins are produced and constructed. Throughout the whole customization process, a mould is created, stamped, plated, and painted. Each step is important to reach the expected quality.
Before making the pin yourself, let us explain how custom metal pins are produced, taking into account what produces a good pin and what leads to a failing one.
Why Are Custom Metal Pins So in Demand?
Metal pins were no longer just decorative items, they began to find themselves more often in branding, recognition programs, corporate events, clubs, schools, military units, product launches, and merchandise.
Owing to their durability combined with a premium look, custom enamel pins – GulfPins remain one of the most requested promotional products in different fields.
Formatted not to be forgotten, unlike printed freebies, metal pins become collectables that people keep forever.
What Materials Are Used to Make Metal Pins?
Most custom pins begin with a metal base.
Common options include:
- Iron
- Brass
- Zinc alloy
- Copper
Each material comes with its own unique advantages for the requirements of finishing, durability, and production method to make custom metal pins.
Step 1: Create the Pin Concept
Every custom pin starts with an idea.
This could be:
- A company logo
- Mascot
- National flag
- Club emblem
- Event badge
- Character illustration
The design should be simple enough to be seen when it is miniaturised, but at the same time, the components of the design should still be visible.
Step 2: Prepare the 3D Lapel Pin Artwork
The artwork is converted into a production-ready file. This is where professional 3D lapel pin artwork becomes extremely important. Unlike standard graphics, production artwork includes:
- Raised metal lines
- Recessed colour areas
- Exact dimensions
- Border thickness
- Colour separation
- Attachment placement
Manufacturers use this artwork to create moulds with precise depth and detailing.
Why Does 3D Artwork Matter?
Good artwork prevents production mistakes.
Clear metal boundaries help colours stay within their designated sections while ensuring small design elements remain visible after manufacturing.
In our experience, simplifying fine details during the artwork stage usually produces a cleaner and more premium-looking finished pin than trying to preserve every tiny element.
Step 3: Create the Metal Mould
Once the artwork is approved, a custom mould is produced. The mould has the precise shape of the pin, and it is used many times during manufacturing.
Due to the fact that the mould outlines every raised portion as well as plated area every time, precision at this stage will reflect on the quality of the final product.
Step 4: Stamp or Cast the Metal
The production method depends on the design.
Stamping
Stamping presses the design into a sheet of metal using high pressure.
It works best for:
- Simple logos
- Flat designs
- Traditional lapel pins
Die Casting
Casting injects molten metal into a mould.
This method is ideal for:
- Complex shapes
- Thick pins
- Textured surfaces
- Multi-level designs
Many modern manufacturers choose die casting for highly detailed custom designs.
Step 5: Trim and Shape the Pin
- After forming the pin, excess metal is removed.
- The edges are carefully trimmed to match the approved outline.
- This process also ensures that the pin is ready for the polishing and plating processes.
- All minor defects are fixed prior to going to the next production phase.
Polishing gives the metal a smooth and professional appearance. It also prepares the surface for plating. Depending on the project, manufacturers may create:
- High-polish finish
- Satin finish
- Antique finish
- Matte finish
The chosen finish changes the overall character of the pin without affecting its design.
Plating adds both protection and visual appeal.
Popular finishes include:
| Finish | Appearance |
| Gold | Warm and premium |
| Silver | Clean and modern |
| Black Nickel | Bold and contemporary |
| Copper | Vintage style |
| Antique Brass | Traditional look |
The finish should complement the artwork rather than overpower it.
If the design includes colored sections, enamel is carefully added between the raised metal borders. Each colour is applied separately. The pin is baked or cured so that the enamel can be hardened. This is the process where custom enamel pins get their unique look.
Soft Enamel
- Raised metal edges
- Textured surface
- More dimensional look
Hard Enamel
- Smooth surface
- Premium finish
- Better scratch resistance
Both designs are widely used, depending on the style or budget requirements of the user.
Step 9: Add Protective Coating
Some designs receive an additional protective layer.
This helps improve:
- Colour durability
- Surface protection
- Scratch resistance
- Long-term appearance
Protective coatings would really come in handy for pins that need to be worn very often.
Step 10: Attach the Pin Backing
The backing is welded or attached to the rear of the pin.
Popular attachment options include:
- Butterfly clutch
- Rubber clutch
- Magnetic backing
- Safety pin
- Deluxe locking clutch
The right backing can depend on the factors of how the pin is worn and the level of security required.
Before packaging, every batch undergoes inspection.
Manufacturers typically check:
- Colour accuracy
- Metal finish
- Edge smoothness
- Back attachment
- Plating consistency
- Overall appearance
Careful quality control reduces any kind of defects and ensures every pin meets the customer’s expectations.
What Makes a High-Quality Custom Metal Pin?
A premium pin is more than an attractive design. Several production factors contribute to the final result.
Sharp borders make artwork easier to recognise and improve colour separation.
Even colour distribution creates a polished, professional appearance.
Quality plating helps maintain the finish after regular use.
Good production starts with good artwork that takes into consideration the constraints of small-scale production.
Common Design Mistakes to Avoid
Some designs look impressive on a computer screen but become difficult to manufacture.
Try to avoid:
- Extremely small text
- Thin outlines
- Too many tiny details
- Excessive colour sections
- Poor contrast between metal and enamel
Keeping the design clean usually produces a stronger final product.
Why Businesses Choose Metal Pins
Organisations continue investing in custom pins because they offer lasting value.
They are commonly used for:
- Employee recognition
- Corporate branding
- Product promotions
- Trade shows
- Conferences
- Sports teams
- Schools
- Collectable merchandise
Different from disposable promotional giveaways, durable pins are commonly kept in use for many years, thus giving the brand continuous exposure even after the event.
Finding Quality Metal Pins in the UAE
Businesses looking for metal pins in UAE should evaluate more than pricing alone.
A reliable manufacturer should provide:
- Professional design support
- Production-ready artwork
- Multiple plating options
- Quality inspection
- Custom sizing
- Flexible order quantities
- Consistent production standards
Reviewing previous work and requesting digital proofs before production can also help avoid costly revisions later.
Readers Usually Ask
-
What makes soft enamel pins different from hard enamel pins?
Soft enamel pins are made up of a raised border and rough surface. Soft enamel pins are defined by their raised metal borders and their rough surface. Hard enamel pins are made of metal and have colored surfaces that are processed to achieve the same height.
-
Which metals are commonly used to produce lapel pins?
The common metals used for lapel pins are iron, brass, copper, and various metal alloys of zinc, iron, copper, and other metals, depending on the requirements of the lapel pin’s design, appearance and cost.
-
What is the timeline for manufacturing lapel pins?
The manufacturing timeline for lapel pins will vary depending on such factors as the nature of the design, volume, and finishing requirements. Production usually follows the artwork approval, mould production, plating, colouring, and inspection for quality.
-
Can details be put in a pin design?
Yes, even though it is possible to design pins with intricate art, a manufacturer may believe such fine lines or text do not pass through production.
-
Why is the need for production art necessary?
Having accurate production art is essential as it allows manufacturers to make accurate moulds and produce clean metal borders while also maintaining an even place for colours across production.
The Final Thoughts
The entire process leading to the production of 3D lapel pin artwork involves numerous stages that range from designing the artwork, through the plating and enamel filling process, to the final inspection.
The more care is taken at each step, the greater the chances are of receiving a durable and professional pin that serves as a symbol of a brand or something else.

Rashaa el Ebrahim is a passionate content contributor at GulfPins.com, sharing insights about custom pins, enamel badges, branding solutions, and promotional products. With a focus on helping businesses across the Gulf make informed decisions, Rashaa creates practical guides, design tips, and industry-focused content that helps brands choose the right custom pin solutions to strengthen their identity and connect with their audience.